Easy Homemade Apple Crisp
Nothing warms the heart quite like a steaming dish of Easy Homemade Apple Crisp. This scrumptious dessert is packed with tender, juicy apples and topped with a perfectly crunchy oat mixture that’s simply irresistible. Whether you’re hosting a cozy family gathering or just treating yourself after a long day, this recipe checks all the boxes: it’s quick, uncomplicated, and downright delicious! Fun fact: apple crisp has its roots in the 19th century when resourceful cooks used oats and sugar to transform their abundant apple harvest into a satisfying dessert.
This recipe is perfect for those who want to impress guests without spending hours in the kitchen. If you’ve enjoyed our classic Chocolate Chip Cookies, you’ll find this dessert equally delightful yet different enough to keep things fresh—and who doesn’t love a good apple dessert? So, grab your apron and let’s dive into this delightful journey of flavors and textures that will surely become a family favorite!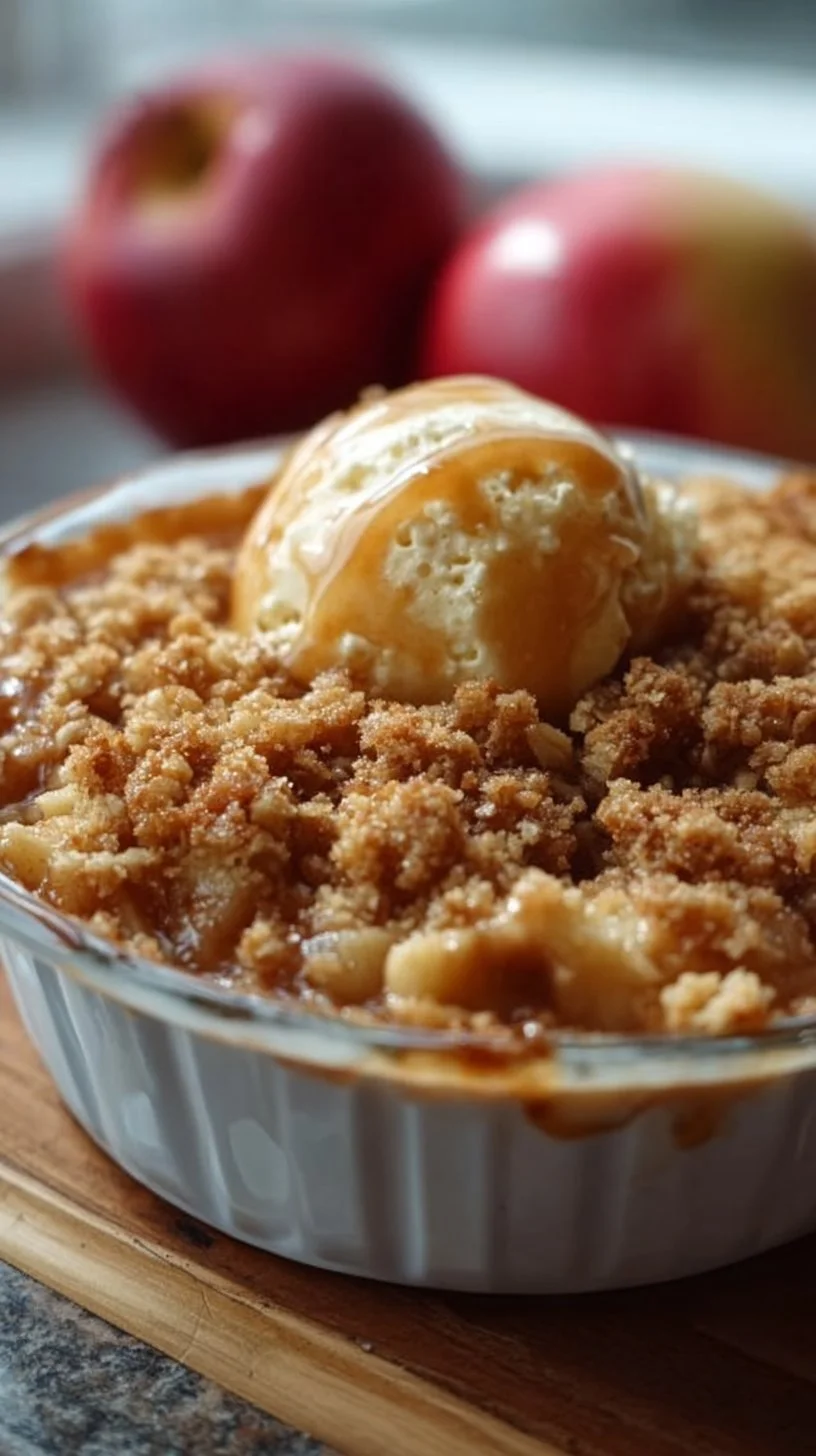
What is Easy Homemade Apple Crisp?
Have you ever wondered why they call it “apple crisp”? Maybe because it’s crispier than your average dessert, or perhaps because one bite is enough to make you shout, “Crisp, please!” This delightful dish brings together tender apples that are kissed by cinnamon and sugar, all then topped with a buttery oat mixture. As they heat together in the oven, the dessert transforms, filling your home with a cozy aroma that’ll have everyone lining up for seconds! As the saying goes, “The way to a man’s heart is through his stomach,” and this apple crisp just might take the cake—err, the crisp! So why not give this delightful treat a try? Your taste buds will thank you!
Why You’ll Love This Easy Homemade Apple Crisp
This Easy Homemade Apple Crisp has everything you could wish for in a dessert. First off, the stars of the show are the apples. They’re perfectly sweet and just a tad tart, coming together in a warm filling that is bursting with flavor. Second, making this dessert at home is budget-friendly. You don’t need fancy ingredients; just some everyday staples and a few apples will take you far! Lastly, the toppings can be a playground for your creativity—add nuts, spices, or even a scoop of ice cream to make it your own. Compared to a traditional pie, this crisp is simpler and quicker, offering the same satisfying flavors without the fuss. So, why wait? Grab those apples and let’s start baking!
How to Make Easy Homemade Apple Crisp
Quick Overview
Creating this apple crisp is as easy as pie—no, seriously! With a prep time of just 15 minutes and a baking time of about 30 minutes, you can whip up this delicious dessert in less than an hour. Perfect for those unexpected guests or a sweet craving that can’t wait, this dessert balances the warmth of cinnamon with the comforting crunch of oats, making it a real crowd-pleaser.
Key Ingredients for Easy Homemade Apple Crisp
To create this delightful Easy Homemade Apple Crisp, you’ll need the following ingredients:
- 6 cups of peeled and sliced apples (Granny Smith are perfect!)
- 1 cup granulated sugar
- 1 tablespoon lemon juice
- 1 teaspoon ground cinnamon
- 1 cup all-purpose flour
- 1 cup rolled oats
- 1 cup packed brown sugar
- ½ cup unsalted butter (melted)
- A pinch of salt
Here’s a glimpse of those delectable ingredients to get you excited about baking!
Step-by-Step Instructions:
- Preheat the Oven: Preheat your oven to 350°F (175°C) to ensure it’s ready for that crisp when you’ve got it all prepped.
- Prep the Apples: In a large bowl, combine the sliced apples, granulated sugar, lemon juice, and ground cinnamon. Toss them well until all the apple slices are coated nicely.
- Prepare the Oat Topping: In another bowl, combine the flour, rolled oats, brown sugar, and melted butter. Stir until it resembles a crumbly mixture.
- Combine: Spread the apple mixture evenly in a greased baking dish. Then sprinkle the oat mixture over the top, ensuring it’s evenly distributed.
- Bake: Pop the baking dish in the oven and let it bake for about 30 minutes, or until the apples are tender and the topping is golden-brown.
- Serve: Once baked, let it sit for a few minutes before serving. It’s divine on its own, or you can serve it warm with a scoop of vanilla ice cream. Enjoy!
What to Serve Easy Homemade Apple Crisp With
This Easy Homemade Apple Crisp is delightful on its own, but pairing it with a few complementary dishes can elevate your dessert experience. Consider serving it alongside a scoop of creamy vanilla ice cream or a dollop of whipped cream to balance out the warm spices. For a more substantial meal, it can be paired with a light, fresh salad or a warm bowl of butternut squash soup to create a cozy dining experience. Enjoy a hot cup of tea or coffee for an afternoon treat that’s sure to impress your guests!
Top Tips for Perfecting Easy Homemade Apple Crisp
To enhance your Easy Homemade Apple Crisp, try these helpful tips:
- Apple Variety: Utilize a mix of sweet and tart apples for a more complex flavor. A combination of Granny Smith and Honeycrisp works wonders!
- Texture Tips: For a crunchier topping, consider adding a handful of chopped nuts like walnuts or pecans to the oat mixture.
- Avoid Soggy Apples: Ensure to drain any excess juices from the apple filling before adding the topping to keep it crisp!
- Adjust Spicing: Don’t hesitate to experiment with spices like nutmeg or ginger to give it your twist.
Storing and Reheating Tips
If you happen to have any leftovers (which is rare for this delicious dessert!), you can store your Easy Homemade Apple Crisp in an airtight container in the fridge for up to 4 days. To reheat, simply pop it in the microwave for a quick 30 to 60 seconds. Alternatively, for the best texture, reheat it in the oven at 350°F (175°C) for about 10-15 minutes until warmed through. If you’re thinking of making it ahead of time, this apple crisp freezes beautifully for up to 3 months—just be sure to let it cool completely before sealing it in a freezer-safe container.
Now, with these tips and this delectable recipe in your arsenal, you’re ready to impress family and friends with your homemade delight. So grab those apples, and let the deliciousness begin! Happy baking!

Easy Homemade Apple Crisp
Ingredients
Method
- Preheat your oven to 350°F (175°C).
- In a large bowl, combine the sliced apples, granulated sugar, lemon juice, and ground cinnamon. Toss well until all the apple slices are coated.
- In another bowl, combine the flour, rolled oats, brown sugar, and melted butter. Stir until it resembles a crumbly mixture.
- Spread the apple mixture evenly in a greased baking dish.
- Sprinkle the oat mixture over the top, ensuring it’s evenly distributed.
- Bake for about 30 minutes, or until the apples are tender and the topping is golden-brown.
- Let it sit for a few minutes before serving. Enjoy it warm on its own or with a scoop of vanilla ice cream.